

The focus of this blog is to pull out warranty start and end dates of Lenovo devices using some existing solutions described below amended to fit my needs.
Credits:
MSEndpointMgr Blog – https://msendpointmgr.com/
Lenovo ThinkDeploy Blog – https://thinkdeploy.blogspot.com/
Jan Ketil Skanke – Twitter
Sandy Zeng – Twitter
Phil Jorgensen – LinkedIn
This blog takes more than enough inspiration if not all from the people over at the MSEndpointMgr blog so the vast majority of the credit for this lies with them. Please visit their page as it really does contain some of the best information out there for doing lots of cool things in the Endpoint space MSEndpointMgr – Microsoft Endpoint Manager Community The post that deals with the Enhanced Intune Inventory was written by Jan Ketil Skanke and Sandy Zeng and can be found here Enhance Intune Inventory data with Proactive Remediations and Log Analytics – MSEndpointMgr. Their full script can be downloaded from their GitHub page which is all linked to in their blog.
I’ve just used all their hard work and added a little bit of a extra sprinkling to it to adjust to my needs. Using their script as a base and the method to get the data into Log Analytics you are only really held back by your knowledge on getting the right PowerShell queries to get what you need. Even then it’s a good opportunity to learn things as you go along which can never be a bad thing.
The information that I really wanted to be able to include was the warranty dates of the Lenovo computers I have. Then using these dates I can prepare reports for when computers are going to reach their end of life and arrange replacements in plenty of time to meet demands.
How do we get the warranty dates?
First of all your devices must have the Lenovo Commercial Vantage app installed and configured. This can be customized and used to provide end users with some additional functionality when using their computers and also allow the IT Admin to manage drivers and firmware updates automatically.
A complete guide to this can be found on the Think Deploy blog which again contains some really good resources from Phil Jorgensen, I recommend taking a look at this if you manage devices from Lenovo. Lenovo Think Deploy Blog. Use this for deploying and configuring Commercial Vantage through Intune. There are two guides in particular which deal with this.
Deploying Commercial Vantage With Intune (thinkdeploy.blogspot.com)
Manage Commercial Vantage with Intune (thinkdeploy.blogspot.com)
The part we are really interested in for this blog was added in version 2104.10 of Commercial Vantage and is the ability to write warranty information to WMI. So following the guides on the above blog we want to add in the following to our policy in a custom OMA-URI (visit the blogs above to fully configure the OMA-URI first then add the below),Name = Write Warranty Information to WMIDescription = This policy setting allows the Administrator to enable Commercial Vantage to writing the warranty information for the system into the Lenovo Namespace WMI table.
OMA-URI = ./Device/Vendor/MSFT/Policy/Config/CommercialVantage~Policy~03E445D7B5956335BEDEF9340AC7E092~7D8BB8A33C8A8577FC2188C5539DFDBB~4D633640E5CF3443867C0771CE6106B0/8431B9B72EC21BF09C22F293D7E3F2D5
Data Type = String
Value = <enabled/>
Checking the WMI information is present
Once you have this deployed to your clients you will see that the ROOT\Lenovo Namespace in WMI is then populated with the warranty information amongst some other good information such as driver details on what drivers are available for the device and if they are installed or not. To check this information is there on the device you can use an app like WMI Explorer to quickly see the information or query it with PowerShell.

By looking in there you should be able to see the information and dates for your machines warranty start and end.

We now have the information we need on the client so it is now a case of making some small amendments to the script to pull that data into Log Analytics.
Amending the Intune script
I won’t go into huge detail on the script itself as that is already provided in much more depth over on the blogs linked at the top. I will describe the adjustments I have made in order to get this data uploaded as part of the payload and it is just some simple additional lines to query the WMI we wrote to earlier. So in the section that is commented as #Get Computer Inventory information we want to add the folllowing lines;
# Get Computer Inventory Information$Computerwarrantyinfo = Get-CimInstance -Namespace root/Lenovo -ClassName` Lenovo_WarrantyInformation | Select-Object StartDate,EndDate $Computerwarrantystart = $Computerwarrantyinfo.StartDate $Computerwarrantyend = $Computerwarrantyinfo.EndDate [datetime]$Computerwarrantystart = $Computerwarrantystart [datetime]$Computerwarrantyend = $Computerwarrantyend
So in the above we are using the Get-CimInstance command to query the root/Lenovo Namespace for the information we told Commercial Vantage to write earlier. I am only interested in the Start and End dates so I selected those two values. (You can drop the ` from the first line it was just to show a continuation of the next line).
Then I am adding the Start and End dates to their own variables.
Finally I am converting them to the datetime format as I found later on I wanted to pull this data out of Log Analytics and into PowerBI and trying to then convert it to a date/time format later just got messy so I wanted to get it out in the correct format from source.
After that section we then need to amend another part to add the variables we created above into the JSON that gets sent up to Log Analytics. So in the section commented #Creare JSON to Upload to Log Analytics we just need to add in the new variables we created (remember you can omit the backticks `),
$Inventory | Add-Member -MemberType NoteProperty -Name "WarrantyStart" -Value` $Computerwarrantystart -Force
$Inventory | Add-Member -MemberType NoteProperty -Name "WarrantyEnd" -Value` $Computerwarrantyend -Force
This adds in the information we need for the warranty and once run on a device it will be sent up to the Log Analytics workspace where we can then either add that information to a Workbook or alternatively pull that through as part of a query to get it into PowerBI as an M Query.
Making sure the data is now in Log Analytics
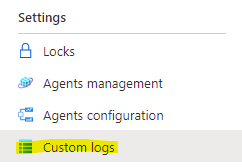
You can check in the Log Analytics Workspace to be sure the new fields are there after it has been run on a client. Click on the Custom Logs area first,
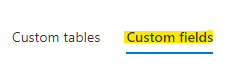
Then you can check the Custom Fields,
Then here you can see the fields that are being populated in Log Analytics (you can see my first attempt where it returned string values then after I changed this we now have date/time). The suffix of the field name also denotes what the data type is “_s” = String and “_t” = date/time.

Once you have had some clients sending data you can quickly check if it has been populated by just querying the entire Device Inventory table in Log Analytics like the below;
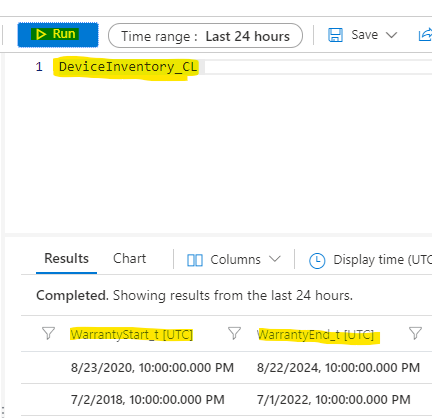
You can see above we have the required information we set out to obtain and can use that either in a Workbook or alternatively pulling that out from there and into PowerBI to make it more widely available across your organization.
What else can we do with this?
Maybe one for a future blog is that along with the warranty information that is written to WMI if you are also updating the drivers using Commercial Vantage it writes information on those also. So you can get information on what drivers are required vs what are already installed. I have this information being pulled out of my devices but the way it is presented in Log Analytics is proving a little unfriendly so I need to brush up on my KQL skills to see if I can get this to show a little better and I will be back hopefully to show how that is done.